



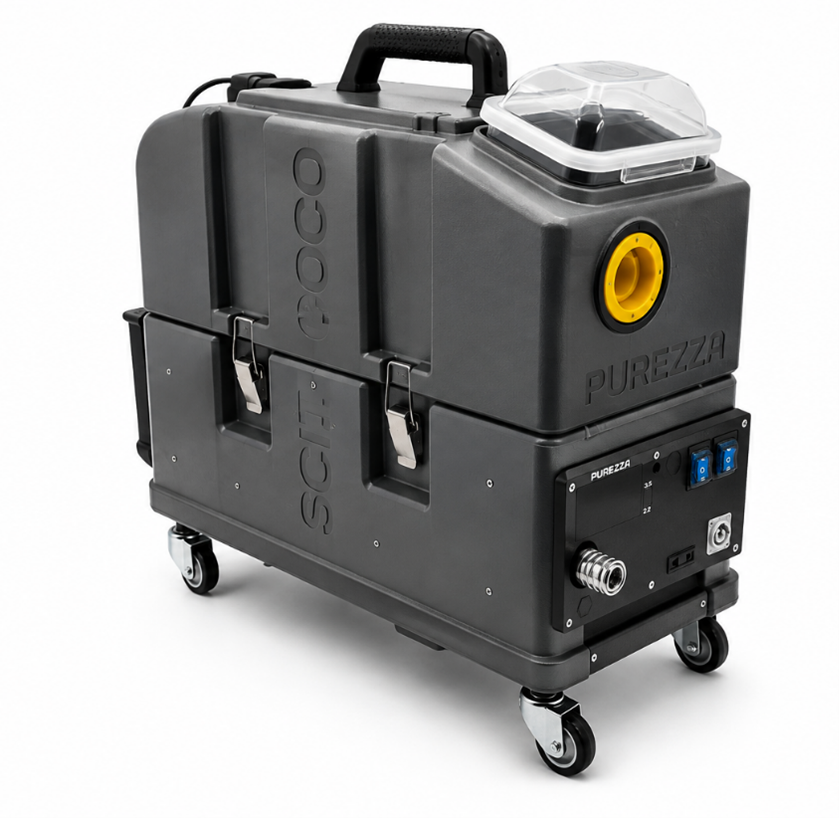
| User Responsibility The user is required to study the manual before operating the equipment, use the equipment for its intended purpose, and perform maintenance after every shift. Failure to comply with the manual's requirements may result in equipment damage and the denial of warranty service if the damage is caused by a violation of operating procedures. |
| Parameter | Value |
| Model | PUREZZA SCIROCCO |
| Power supply | 220 V / 50 Hz |
| Vacuum turbine power | 1800 W |
| Vacuum | Up to 3800 mm H₂O |
| Operating suction pressure | Up to 360 mbar |
| Pump pressure | Up to 12 bar |
| Clean-water tank capacity | 14 L |
| Wastewater tank capacity | 15 L |
| Power cable length | 10 m |
| Pump duty cycle | 1 min on / 1 min off |
| Maximum continuous turbine operation | 40 min, followed by at least 20 min of cooling |
4. Supplied Equipment Standard package:
- PUREZZA SCIROCCO extractor;
- U3DP_Clean V3 dual-chamber extraction tool;
- 5 m water supply hose;
- water flow control valve;
- flexible suction hose end section;
- 32/40 mm suction hose, 5 m;
- stainless-steel hydraulic quick coupling;
- thermal barrier;
- 10 m power cable;
- operating manual.
- integrated inline heater;
- automatic wastewater drain system;
- automatic clean-water fill system;
- second vacuum turbine;
- additional tools: curtain, VF, pre-spray, carpet and other tools;
- additional water supply and suction hoses.
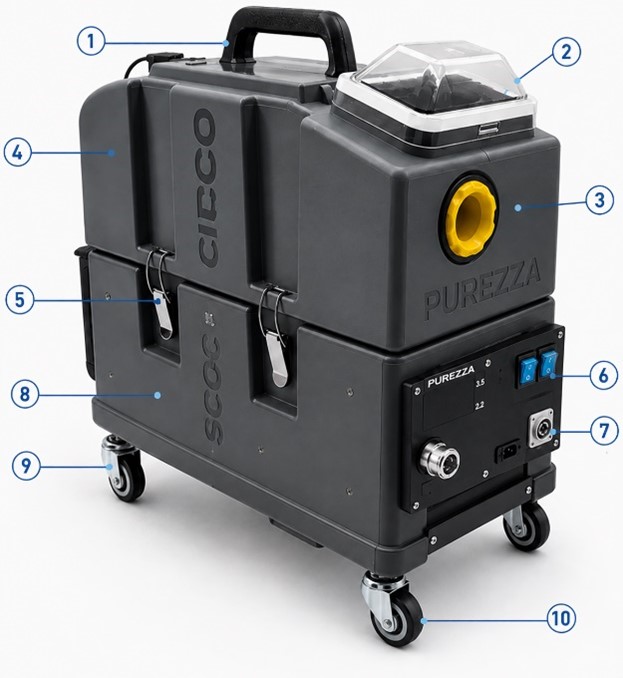
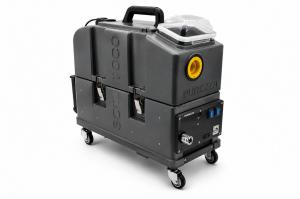
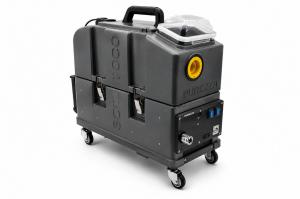
- Carrying handle — for transporting the machine (1).
- Inspection window cover — for monitoring suction (2).
- Suction inlet — for connecting the suction hose (3).
- Upper wastewater tank; the drain hose is located at the rear (4).
- Latches — connect the upper and lower tanks and provide access to the tank and components (5).
- Control panel — pump and turbine on/off switches, indicators and connection ports (6). The panel also has quick couplings for the water supply hose.
- Quick-disconnect power cable socket (7).
- Lower clean-water tank (8).
- Swivel castors — for moving and securing the extractor (9–10).
Before use, always:
- check the housing, cable, plug and connections for damage;
- use only a serviceable, earthed 220 V electrical supply;
- keep water away from electrical components;
- do not use flammable, explosive or toxic liquids;
- do not use aggressive chemicals that are unsuitable for extraction equipment;
- do not operate with a full wastewater tank;
- use a defoamer when excessive foaming occurs;
- do not operate below 10 °C or above 40 °C, or at humidity above 70%.
- point the suction hose or tools at people or animals;
- pick up burning objects, cigarette ends, solvents, petrol or other flammable substances;
- open the tank while the machine is running;
- allow children or untrained persons to operate the machine;
- disassemble electrical components without first disconnecting the power supply.
|
Stop immediately Switch off and unplug the machine if foam or water escapes, the motor becomes unusually noisy, there is a burning smell or overheating, or suction or solution flow decreases. |
After unpacking, check that the delivery is complete and undamaged. If you have any doubts about the product’s condition, contact the manufacturer. Keep packaging materials (bags, boxes, fasteners, etc.) out of children’s reach. Dispose of or store packaging in accordance with applicable environmental requirements. The machine is supplied in a cardboard box. On receipt, inspect all components for damage during transport. If any damage is found, immediately submit a complaint to the carrier: the manufacturer’s warranty does not cover parts or assemblies broken or damaged by improper transport.
|
Caution Given the machine’s size and weight, observe all workplace safety rules to protect the operator when lifting and moving it. |
- Place the machine on a level, stable surface.
- Check the housing, power cable, hoses, quick couplings and tool for damage.
-
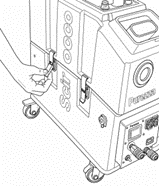
Release the side latches and lift the upper tank.
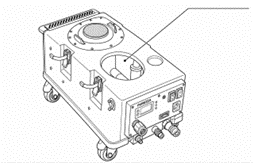
- Fill the lower tank with water or working solution through the filling opening. Follow the chemical manufacturer’s instructions.
5. Secure the upper tank to the lower tank with the latches.
6. Connect the suction hose to the extractor and the tool.
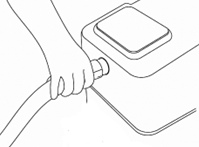
7. Connect the water supply line to the quick coupling until it clicks into place.
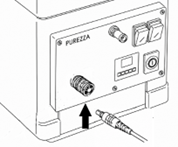
8. Select a tool suitable for the surface and task.
9. Check all connections for leaks.
10. Connect the equipment to a 220 V power supply. 9. Operating Procedure
Standard operation
- Switch on the vacuum turbine.
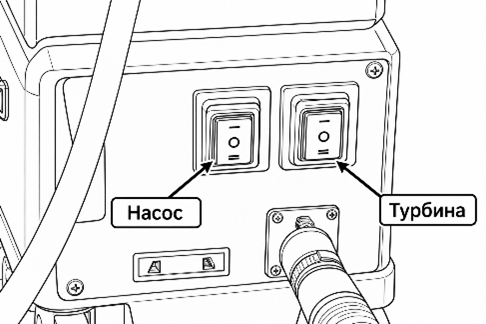
Note.Control diagram: left — Pump; right — Turbine. The switch on the right controls the turbine. The upper position forces it on. The lower position enables automatic turbine shutdown when the drain/fill system is fitted, providing overflow protection.
The switch on the left controls the pump. The upper position forces it on (it always runs if no automatic control is fitted). The lower position enables automatic pump shutdown.
- Switch on the solution supply system.
- Apply solution while pulling the tool towards you and holding the spray trigger.
- Release the trigger while moving the tool away from you to extract residual moisture from the surface.
- Clean with smooth, overlapping passes.
- Do not hold the tool on one spot for an extended period.
- Monitor the wastewater tank level.
- When finished, switch off the pump and turbine, then unplug the machine.
Recommendations
- do not over-wet the surface;
- follow the chemical manufacturer’s recommendations;
- check suction performance regularly;
- for deep cleaning, solution may be pre-applied to part of the surface before extracting the dirt.
- use low-foaming formulations;
- follow the specified dilution ratios;
- do not exceed the recommended concentration;
- flush the system with clean water after using aggressive formulations;
- use a defoamer if heavy foaming occurs.
- drain the wastewater;
- rinse the wastewater tank;
- rinse the clean-water tank;
- flush the hoses and water supply line;
- rinse the cleaning tool and spray nozzles;
- allow the equipment to dry with the cover open.
|
Mandatory flushing After each use, pour several litres of clean water into the lower tank and briefly run it through the pump and tool. This reduces the risk of blockages, chemical residue deterioration and damage to the pump, couplings and spray nozzles. |
12. Maintenance
Before daily start-up
- visually inspect the power cable;
- check the switches and connections;
- check the motor filter;
- check tank levels and cleanliness;
- check the hoses and accessories;
- ensure that the wastewater tank is clean and dry.
Weekly
- check for leaks;
- inspect the hoses;
- check the quick couplings;
- clean the water filter.
Monthly
- check the pump’s condition;
- check the turbine’s condition;
- check the electrical wiring;
- check the fasteners and tank latches.
| Fault | Possible cause | Action |
| Machine does not start | No power; damaged cable or plug | Check the supply, cable, plug and circuit breaker. |
| No suction | Blockage or air leak | Check the hoses, connections, tank cover, filter and water level. |
| Weak suction | Partial blockage or dirty filter | Clean the filter, hose, tank and tool. |
| No solution flow | Empty tank; blocked supply line or nozzle | Check the water, quick couplings, hose, filter and nozzle. |
| Leaking connections | Damaged fittings, seals or latches | Check the connections, replace the seals or contact a service technician. |
| Uneven spray pattern | Blocked nozzle | Clean or replace the nozzle. |
| Foam entering the tank | No defoamer used | Switch off the machine, rinse the tank and use a defoamer. |
- transport the equipment only in covered vehicles;
- protect the product from moisture, impacts and falls;
- drain water from the tanks and system before transport;
- do not allow liquid inside the system to freeze;
- store the machine in a dry room with the cover open.
|
Manufacturer’s voluntary warranty This warranty does not limit the buyer’s rights under the laws of the Russian Federation. For buyers purchasing equipment for business use, the terms of the contract (Public Offer), invoice agreement and this manual apply. |
| Warranty coverage | Period |
| Product assembly quality | 1 month from the date the product is handed over to the buyer |
| Tank integrity | 3 months from the date the product is handed over to the buyer |
Conditions of warranty coverage
- proof of the date the product was handed over to the buyer;
- use of the product for its intended purpose;
- compliance with operation, maintenance, transport and storage requirements;
- no evidence of unauthorised disassembly, repair, design modification or interference with electrical or hydraulic components;
- submission of the product to the manufacturer or an authorised service technician for inspection.
The warranty does not cover
- consumables and components subject to normal wear: filters, seals, spray nozzles, hoses, quick couplings, fittings, cables, brushes, rings, gaskets and similar items;
- blockages, contamination, chemical residue deterioration, deposits and the effects of delayed flushing or maintenance;
- damage caused by unsuitable, aggressive, high-foaming or incorrectly diluted chemicals;
- damage caused by foam, water, dirt or foreign objects entering the turbine, motor, electrical components or pump;
- damage caused by liquid freezing in tanks, hoses, the pump, nozzles or connections;
- mechanical damage: cracks, chips, scratches, deformation and damage caused by falls, impacts, pressure, kinked hoses or improper transport;
- the effects of operating with a full wastewater tank, without a filter, with a damaged filter or without a defoamer when foaming occurs;
- the effects of voltage surges, lack of earthing, a faulty electrical supply or extension leads with an inadequate load rating;
- damage caused by third parties, animals, insects, natural events, fire, flooding or other circumstances unrelated to a manufacturing defect;
- faults arising from continued operation with a known, unresolved defect.
Warranty claim procedure
- Stop using the product when a fault is detected;
- Clean off dirt and chemical residues and drain the tanks;
- Prepare photos/videos of the fault, the purchase date, serial number and a description of operating conditions;
- Submit the product to the manufacturer or an agreed service technician for inspection;
- Eligibility for warranty repair is determined by the inspection results, taking into account the nature of the fault and compliance with operating instructions.
Limitation of liability
For buyers using the product for business purposes, the manufacturer is not liable for downtime, loss of profit, replacement equipment costs, lost orders or other indirect losses unless expressly agreed otherwise in writing. For consumer buyers, warranties and liability apply to the extent required by the laws of the Russian Federation. 16. Service Life and Disposal The extractor’s estimated service life is at least 5 years, provided that the requirements of this manual are followed.The turbine’s estimated operating life depends on the duty cycle, maintenance and operating conditions and is approximately 800 hours.
At the end of its service life, do not dispose of the machine with household waste. Hand over the product and any waste generated during disposal to specialist organisations in accordance with applicable laws of the Russian Federation.
Comments
No comments yet. Be the first.